Showing posts with label Tips. Show all posts

Thursday, September 20, 2012

HDR - Part 3: Importing and Processing

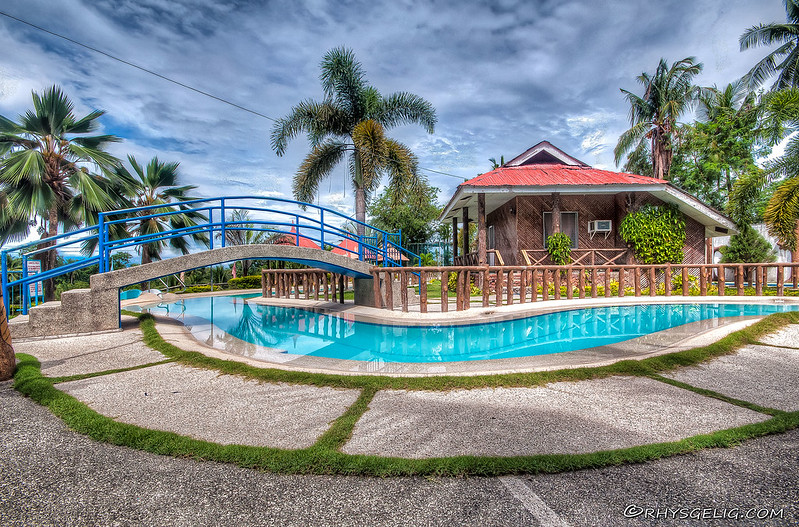
The Final Image


HDR post processing isn't that much difficult.  It really boils down to the creativity of the photographer on how to express the image.  I sometimes like it grungy but most of the time I like it realistic and not too saturated.  I often convert it to black and white.

I am using Photomatix to show this example.  These will be the images I'll be merging to HDR.


Import/Export the Images

I use Lightroom and import the images there.  From Lightroom, I export it into Photomatix.


Select the three images, then export to Photomatix Pro, as seen on the image above.


Then you'd see this dialog box (above) with different settings.  Since the three images were taken handheld, Align images should be checked.

Ghosting refers to motion blur, I always check this to minimize motion blur on some objects.

And of course, reduce noise is checked for basically reducing noise.

Then export.


This is the Photomatix Pro window.  As you can see, the result is pretty much ok.


Photomatix Settings

This is the adjustments panel in Photomatix Pro.  I won't describe each setting but you can point to a setting and a description will appear on the bottom (in this image, the Lighting Adjustment is described).  I'll just be focusing on the settings that I find essential.

Strength

Controls the amount of overall effect of the succeeding settings.  If you like the grungy effect, set this to 100%.

Color Saturation

Controls the overall saturation of the image.   If you wish to go black and white, set this to 0.

Luminosity

Controls the compression of tonal range.  If you move the slider to the right, it boosts shadow detail and brightens the image.  Opposite effects if slider is moved to the left.  

Detail Contrast

Controls the overall contrast of the image.  Moving the slider to the right increase contrasts, gives a sharper look to the image and darkens the image a bit.

Lighting Adjustments

Controls the overall "look" of the image.  For a natural look, move the slider to the right.  For a more painterly, surreal look, move it to the left.

White and Black Point

These two controls the highlights and shadows of the image.  I also controls contrast.

Gamma

Controls the mid tones.  Darkens or brightens the image globally.

Micro-smoothing

Controls small detail enhancements.  This tends to minimize noise, especially in the sky.  For a grungy look, set this to zero.


Quick Tips

Here are a few tips on processing hdr.  I like a natural, detail, and a little bit grungy look in HDR images.  Here's my adjustment flow

  1. Start with the default present on the photomatix pro.  The default present gives out a decent result for a natural look.  Don't forget after merging you can enhance the image in Lightroom and Photoshop.  The default present is always my starting point.
  2. Try to get a natural detailed look.  Adjust Strength to 100, boost Detail Contrast (to a max of 80) and add a little Luminosity.
  3. To lessen dark shadows, increase White Point and move Gamma to the right.
  4. Add a little Black Point to increase contrast.
  5. Add a little Micro-Smoothing to minimize that grungy effect.  And increase Smooth Highlights to preserve the sky.
  6. Add a little Lighting Adjustment (to the right).
  7. Now to get that natural look, decrease Strength to about 80.

Blending these settings takes time and practice.  Move the sliders to it's max and minimum to see how it affects the image then slowly adjust to your liking.  There is no right or wrong in HDR processing. you have the creativity freedom to do what you want your final image is.


Re-import to Lightroom

After adjusting the image in Photomatix, hit Save and Re-import.  The final image will be re-imported to Lightroom for further enhancement.

Once in Lightroom, you can adjust the global Exposure, Contrast and Color of the image.  If you go grungy, increase Clarity.

I usually apply Nik's Viveza plugin and adjust Structure, Shadows and Brightness. 

You may further enhance the image by exporting it to Photoshop.


Photoshop Post Process

In Photoshop you may enhance the image further.  Usually in Photoshop, I just apply my watermark.


Final Note

This is only a basic tip on HDR processing.  Try to experiment on the different settings in Photomatix and see if you like the effect.  I sometimes just apply the Default Present in Photomatix and enhance the image in Lightroom and save the image.  Like I said, it takes time and practice.  Remember, every image is different; so try to adjust the settings in Photomatix.

Lightroom and Photoshop post processing isn't necessary but it does enhance the image further.


HDR - Part 1: Capturing Images
HDR - Part 2: HDR Software


HDR - Part 2: HDR Software

There are a number of HDR software.  HDRsoft Photomatix Pro 4, Nik HDR Efex pro 2 and Adobe Photoshop HDR Pro are some of the more popular software for HDR.


HDRSoft Photomatix Pro 4

Photomatix is probably the most popular HDR software.  This is what I use when rendering HDR images.  It has lots of options to adjust the image.  Creativity's the limit when it comes to the options provided by Photomatix.  

It has a plugin for Lightroom which is great for Lightroom users.  You can directly export the images from Lightroom to Photomatix then re-import after tone mapping.


Nik HDR Efex Pro 2

I enjoy plugins from Nik Software and HDR Efex Pro 2 in one of them.  HDR Efex Pro also has a lot of options to choose from.  What makes HDR Efex Pro interesting is it's U Point Technology wherein you may control the amount of effect on a specific area of an image.  It also has a plugin for Lightroom and it also integrates with Photoshop.


Adobe Photoshop HDR Pro

Photoshop is the most popular photo editing software and it has built-in HDR rendering application.  It has lesser options but does a pretty good job creating HDR.  


What ever software you choose, remember when creating HDR images, the sky's the limit when it comes to creativity.


HDR - Part 1: Capturing the images
HDR - Part 3: Importing and Processing


HDR - Part 1: Capturing the images

Perspective


What is HDR? How do you take these kinds of images? What is required to shoot such image? Read on and learn a few tricks on shooting HDR.


What is HDR?


HDR stands for High Dynamic Range. 


" HDR is a range of methods to provide higher dynamic range from the imaging process. Non-HDR cameras take pictures at one exposure level with a limited contrast range. This results in the loss of detail in bright or dark areas of a picture, depending on whether the camera had a low or high exposure setting. HDR compensates for this loss of detail by taking multiple pictures at different exposure levels and intelligently stitching them together to produce a picture that is representative in both dark and bright areas. "  ~Wikipedia~

Simply put, HDR shows the bright, mid, and dark areas of an image.  It is a way to mimic how our eyes sees the world.  In HDR, the image can be processed exaggeratedly thus making the image more like a painting.  Nevertheless, HDR is like an art.

How to shoot HDR?

To make an HDR image, you'll need to have 3 images of the scene at different exposures.  This is where the auto bracketing feature of dslrs are used.  Typically you'll need a correctly exposed image, an overexposed image and an underexposed image.  

Here are some tips


Set your camera to shoot continuously or burst shot.  This needs to be set so as to avoid or minimize any motion blur, especially if your shooting with objects that may sway with the wind, like trees or plants. 

If your camera has a mirror lock or delay exposure, activate it.  This reduces blur from shutter movement.

If possible, mount your camera on tripod to minimize blur, especially indoors.

Use a shutter cord trigger to further minimize blur from pressing the shutter button.


Now for the different image exposure:

Auto way


Set your auto bracketing to bracket exposure (AEB) and  set it at 2EV interval.  Some cameras offer features like the number of images you'd like to bracket, but the default is 3 images.  You may go for more than 3, if your camera allows it, but just start with 3.

Manual way


If your camera doesn't offer an auto bracketing feature or you just want to manually adjust the exposure, then you may set the exposure manually.  You may: 1.) set exposure by adjusting the EV (exposure value) to +2EV and -2EV and using aperture priority mode; or 2.) manually adjust the shutter speed to 2 stops up and 2 stops down.  Of course, you can't use the continuous mode when doing manual adjustment.


Now take the 3 differently exposed images.   Check to see if you got: 1 correctly exposed image, 1 underexposed image and 1 overexposed image.

These 3 images will be used to process the HDR image by using an HDR rendering software like Photomatix, HDR Efex or in Photoshop.  Now you are ready for processing.


HDR - Part 2: HDR Software
HDR - Part 3: Importing and Processing


Monday, September 10, 2012

Why Lightroom beats Bridge and Camera Raw

Here are 100 ways why Lightroom kicks Bridge's and Camera Raw's arse.   These are 100 video clips by Matt Kloskowski and Scott Kelby explaining why Lightroom is better than Adobe Bridge and Camera Raw.  It's quite entertaining and informative.

Here's the LINK.  Watch it, you may learn 100 things about Lightroom. :)


Saturday, September 1, 2012

Online Photo Sharing

Since we're talking about photography, I wonder, what are you doing with your photos?  Is it for personal use? or do you want to share and show it off.  I bet you're itching to show off some of those images to the world.  

Facebook has been a medium for communication and social media sharing.  You can upload videos and photos.  It is a means to show off your images to your friends.  There is one catch though.  Sometimes Facebook distorts or doesn't correctly display your images.. Sometimes.. Especially images which is extensively post processed.  


You can't share your Facebook images to online forums.  For you to share your images to forums, you'll need to join an online photo sharing website.


Here are a few free online photo sharing sites to note.


Flickr


Flickr probably is one of the popular online photo sharing site out there.  The best feature is it's Share button above your image.  Under the share button, are options on how to share your image, from a simple link (to share in Facebook) to basic html code (for sharing in blogs or website) and  BBCode which is used to share through online forums.  You can even choose how large you want your image be shared (for Html and BBcode only).


flickr share button
Here's what's under the Share button.


Hmm...Ok earthquake over, now back to blogging (8/31/2012 9:00pm Manila time).


Flickr service is free.  You may upload unlimited photos but only the recent 200 images will be shown on your profile (but not deleted, just hidden) and a 300mb upload limit per month.  Of course, Flickr has a pro version at 24.95USD per year which negates the upload monthly limit and shows all your uploaded photos.


Besides an online photo sharing site, Flickr is also, sort of an online social medium for photographers.  You can browse other peoples photos and comment.  You may create groups and add photos pertaining to that group.  It even has it's own Like button, the Favorite button (with a star).


This is my main online photo sharing site.  All of my images are stored here.


If you're starting out in photography, I suggest in opening an account in Flickr and share your photos.


Photobucket

Photobucket is another online photo sharing site.  Like Flickr, Photobucket has it's own community.  You may comment and Like on other member's images.  It also has a share mode with Html and, instead of BBcode, it only shows [IMG] code for online forums.

Unlike Flickr, Photobucket only has 2 options for size, the full size and a thumbnail version.


Photobucket also has a Pro version at 24.95USD per year.  Benefits of pro is no ads in your profile and an unlimited bandwidth (compared to free account which has 10GB/month bandwidth allocation).  Pro and free versions enjoy unlimited storage.


I only use Photobucket to store my miscellaneous images which I use for my personal blog.


Picasa Web Album
Picasa web album is from Google.  It has it's own community too.  Commenting and sharing are available.  You may choose the size of the image when sharing, which is a good thing, but it lacks the BBcode used for online forums.

Picasa web album has a 1gb storage limit for the free account.  There is an upgrade storage option with 25gb and 100gb at 2.49USD/month and 4.99USD/month, respectively.

I haven't explored much with Picasa.  I only use this storage for images found in this blog.


These are more online photo sharing services out there but these three are the only one's I've used.  If you don't have an online photo sharing account, open one now and share away.

Thursday, August 30, 2012

RAW vs JPEG: Which one should I use?

Common question I usually find in photography forums is "Which one should I use? Raw or Jpeg?".  Some say raw is best and others say jpeg ftw, and it even got heated in one of the threads I read.  I've actually asked this question myself when I first started photography.  I bet you are wondering too.   I won't discuss the specifics of Raw and Jpeg, there are a lot of blogs that explain this in detail (check out links below).  I'm here to share my experience in shooting raw and jpeg.


RAW


Raw file is an uncompressed and lossless data straight from the camera sensor. It looks washed out or has lack of contrast.  It usually not sharp.  The file is larger in memory  size compared to jpegs because it holds a lot of data.  You'll need a computer software to read these files.  

Shooting raw takes a lot of memory space in your recording medium (SD or CF cards).   It also takes awhile to record raw files to memory cards compared to jpegs.  Sports photographers usually use jpegs because if they shoot raw, the image buffer in their cameras would be full in a matter of seconds; especially cameras with high frame rate per second.


You'll need to post process raw files and convert them to readable formats like jpeg or tiff.  Raw files are typically a propriety format.  Nikon's raw files are .NEF while Canons are .CR2.  Software, like Adobe Camera Raw or Lightroom, is used to process raw files.


What I love about processing raw files is that you may edit the file extensively, with minimal data loss, compared to jpegs.  


Best used for:

Raw is best used when shooting fashion, portraiture, landscape and hdr.  For fashion and portraiture, extensive post processing is done to get that smooth skin and skin tones.  In my experience, raw for landscape is best to have a larger leeway for correcting exposure.  And of course for HDR (high dynamic range),  HDRs are post processed images, use raw.


JPEG


Jpeg's are relatively small in memory size.  These produce a compressed, sharp, and contrast images.  It is also printer and web friendly compared to raw.  

Because jpeg's are compressed files, it gives a very little leeway for editing.  It easily loses data when edited extensively.  


Best used for:

Jpeg is best used when shooting street, sports and events.  Due to it's small memory size, shooting jpeg for sports and events is practical, so you won't need a ton of memory cards to carry with you.  And besides, there's not much need to post process sports or events.


Summary


Generally, use raw if you need extensive post processing and jpegs if not.  If you're on the go, use jpeg to maximize the memory capacity of your memory cards.


So, which one do you think should you use?


References:

RAW vs. JPEG - dPs
RAW vs JPEG - Kenrockwell
RAW vs JPEG - slr lounge

Monday, August 27, 2012

New to photography: Exposure Trio

My previous post, New to photography: Gear, I talked about gears to start.  Now you buy your camera, read the manual, and tried some shots. Common questions I hear from newbies are: Why aren't my images look good? Why is it dark? or Why is it blurry? I will discuss some basics in photography namely the Exposure Trio.


What is Exposure?

Exposure is the amount of light that your sensor captures.  Photography is all about light. It is like your eyes. The eyes captures light. We see color, contrasts, brightness, darkness; in the same way the camera medium does, in this case the sensor. So basically photography is capturing light.

How to control exposure?

In photography, there are three main aspects in controlling exposure, the exposure trio. These are ISO, Shutter Speed, and Aperture.   Each of these three have their own commands in your dslr. That's why READ your manual for a smoother photography experience.


Now you might wonder what these trio actually do.  Here is a quick explanation of each.

ISO

ISO basically is the  sensitivity of your sensor to light.  The higher the ISO the more sensitive or more light can be captured.  High ISO has it's downside.  Current mid level dslr's now can go as high as ISO 25,600.  Whew!  But at a cost, noise.  To have a clean image, a low ISO is best and around ISO 3,200 the max (based on Nikon D7000 ISO performance), or even 6,400.   So be careful in adjusting your ISO.  Test your camera and find out at what max ISO can you get a clean image.

Shutter Speed

Your camera has a shutter.  It opens when you press the shutter release to expose your sensor to the light.  Shutter speed pertains to how long your sensor is exposed to the light coming in through the lens.  It is measured in seconds.  Current mid level dslr's have a shutter speed of 1/8000 sec. to 30 sec, and of course, Bulb mode for even longer exposures.

Shutter speed has a way with motion.  If you use a fast shutter speed, say 1/2000 sec., you would freeze the moving object.  But if you use a slower speed, like 2 sec., you'd see a motion blur.  For sports photographers, a fast shutter speed is required, to get that sharp and crisp action.  For landscape photographers, a slower shutter speed is need to get that creamy effect in running water or waves. 

Aperture

Aperture is the size of the opening of the lens.  It is designated with the " f ", example f/1.8.  Aperture controls the amount of light passing through the lens to the sensor.   It is also called f-stops.  

Most of those new to photography will be confused on how to describe the f-stop.  The larger the number, say f/16, is referred to as a small stop.  But a f/1.8, is the large stop.  Don't get me wrong, I myself get confused sometimes.

Aperture controls DOF or Depth of Field.  Meaning a smaller stop (around f/8 upward) will produce sharper image across the frame, while a larger stop (like f/1.8) will produce what we call a bokeh or blur to the background or foreground of a subject.  Landscape shooters and studio shooters shoots at smaller stops to get the detail of the entire frame while an outdoor portrait shooter shoots at larger stops to get the bokeh effect.


Whew! a lot to sink in.  If you've noticed all three controls the light that passes through the camera.  Think of it as this:

ISO - how sensitive to light
Shutter Speed - how long the light passes through
Aperture - how large the passage of light

Mixing the amount of each is an art of light.  It is like your playing with light using your camera.

Keep on shooting.

Sunday, August 26, 2012

New to Photography: Gear

A few of my friends who want to start a hobby in photography asks me; What brand of camera should they buy?  Common brands are (of course) Nikon or Canon.  Another question I encountered is: What lens do I start with?

Here are my recommendations for you guys who want to try photography:


Camera Brand

Nikon or Canon?  Either brand will do, heck you can go for Sony or Olympus, just as long as you enjoy your craft.  

Go with the brand which most of your friends, with dslr's, are using.  In that way, if you have questions on the operation of the gear, you can ask your friends how.  

If your friends aren't into photography but you are, then go to a photography store and try out the cameras.  Choose which one feels right.

I would recommend a middle level cameras.  You know those cameras with a top lcd, like Nikon's D7000 or Canon's 60D, if your budget permits.  These cameras give you much control of your shooting style.  But if you're in a budget, then go with the entry level dslr's.  

Lens

Start off with the kit lens, like 18-55mm or 18-105mm.  These are good lenses.  Learn the ways of the art and look for your genre.  If you've found the genre of photography you want, then go and buy lenses specifically for the genre.  For instance, you find yourself loving landscapes, like I do, then go look for an UWA (Ultra-wide lens) like Sigma's 10-20mm.

I'd recommend that you at least have a prime lens, a 50mm.  Whether or not you're into portraits, having a prime lens is a must.  I'm sure you'll want to try those lovely bokeh, blurry backgrounds, usually in portraits.   You'll never know when you might need it.

Manual

Read the manual!!  Study the camera, know the in's and out's of your new toy.  Once you've learned the commands, capturing image would be a smooth operation.

Camera Bags

Bags are important.  Find a bag that suits your needs.  First find a bag that is simple and ambiguously looks like a normal bag, for safety.  There are bags that at first glance you'd know it's a camera bag.


These are the basic gears to start your journey to photography.  There are more "genre-specific" gears like tripod, flashguns, light stands, etc.  Get these only when you've found your true genre.  

So go out and shoot, shoot, shoot.