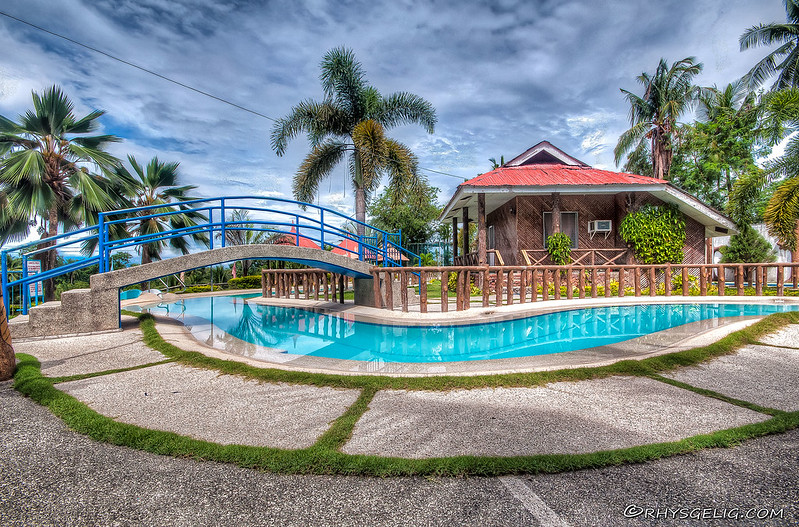
 |
| The Final Image |
HDR post processing isn't that much difficult. It really boils down to the creativity of the photographer on how to express the image. I sometimes like it grungy but most of the time I like it realistic and not too saturated. I often convert it to black and white.
I am using Photomatix to show this example. These will be the images I'll be merging to HDR.
Import/Export the Images
I use Lightroom and import the images there. From Lightroom, I export it into Photomatix.
Then you'd see this dialog box (above) with different settings. Since the three images were taken handheld, Align images should be checked.
Ghosting refers to motion blur, I always check this to minimize motion blur on some objects.
And of course, reduce noise is checked for basically reducing noise.
Then export.
This is the Photomatix Pro window. As you can see, the result is pretty much ok.
Photomatix Settings
This is the adjustments panel in Photomatix Pro. I won't describe each setting but you can point to a setting and a description will appear on the bottom (in this image, the Lighting Adjustment is described). I'll just be focusing on the settings that I find essential.
Strength
Controls the amount of overall effect of the succeeding settings. If you like the grungy effect, set this to 100%.
Color Saturation
Controls the overall saturation of the image. If you wish to go black and white, set this to 0.
Luminosity
Controls the compression of tonal range. If you move the slider to the right, it boosts shadow detail and brightens the image. Opposite effects if slider is moved to the left.
Detail Contrast
Controls the overall contrast of the image. Moving the slider to the right increase contrasts, gives a sharper look to the image and darkens the image a bit.
Lighting Adjustments
Controls the overall "look" of the image. For a natural look, move the slider to the right. For a more painterly, surreal look, move it to the left.
White and Black Point
These two controls the highlights and shadows of the image. I also controls contrast.
Gamma
Controls the mid tones. Darkens or brightens the image globally.
Micro-smoothing
Controls small detail enhancements. This tends to minimize noise, especially in the sky. For a grungy look, set this to zero.
Quick Tips
Here are a few tips on processing hdr. I like a natural, detail, and a little bit grungy look in HDR images. Here's my adjustment flow
- Start with the default present on the photomatix pro. The default present gives out a decent result for a natural look. Don't forget after merging you can enhance the image in Lightroom and Photoshop. The default present is always my starting point.
- Try to get a natural detailed look. Adjust Strength to 100, boost Detail Contrast (to a max of 80) and add a little Luminosity.
- To lessen dark shadows, increase White Point and move Gamma to the right.
- Add a little Black Point to increase contrast.
- Add a little Micro-Smoothing to minimize that grungy effect. And increase Smooth Highlights to preserve the sky.
- Add a little Lighting Adjustment (to the right).
- Now to get that natural look, decrease Strength to about 80.
Blending these settings takes time and practice. Move the sliders to it's max and minimum to see how it affects the image then slowly adjust to your liking. There is no right or wrong in HDR processing. you have the creativity freedom to do what you want your final image is.
Re-import to Lightroom
After adjusting the image in Photomatix, hit Save and Re-import. The final image will be re-imported to Lightroom for further enhancement.
Once in Lightroom, you can adjust the global Exposure, Contrast and Color of the image. If you go grungy, increase Clarity.
I usually apply Nik's Viveza plugin and adjust Structure, Shadows and Brightness.
You may further enhance the image by exporting it to Photoshop.
Photoshop Post Process
In Photoshop you may enhance the image further. Usually in Photoshop, I just apply my watermark.
Final Note
This is only a basic tip on HDR processing. Try to experiment on the different settings in Photomatix and see if you like the effect. I sometimes just apply the Default Present in Photomatix and enhance the image in Lightroom and save the image. Like I said, it takes time and practice. Remember, every image is different; so try to adjust the settings in Photomatix.
Lightroom and Photoshop post processing isn't necessary but it does enhance the image further.
HDR - Part 1: Capturing Images
HDR - Part 2: HDR Software


No comments:
Post a Comment